BIGGLES DEFIES THE SWASTIKA
Book First Published in August 1941 - 249 pages
The story was first published in seven monthly parts, as BIGGLES
FLIES ALONE, in two different magazines
The two magazines were AIR DEFENCE CADET CORPS GAZETTE which contained parts one to five and AIR TRAINING CORPS GAZETTE which contained parts six and seven.
Parts one to five were published monthly from September 1940
until January 1941 and then parts six and seven were published in March and
April 1941.
(Nothing was published in February 1941 as the Air Defence Cadet
Corps Gazette was being re-organised into the Air Training Corps Gazette)

The first edition dust jacket showing
the original price of 4 shillings – note that the text on the rear cover is
brown on the first edition dust jacket

The SECOND edition dust jacket was also
priced at 4 shillings – note that the text on the rear cover is blue and the
creases on the spine show where it was wrapped around the thinner second edtion
CHAPTERS
Click on any chapter for a summary of the events in that chapter or
see the general story summary below
VII – WHAT HAPPENED AT STAVANGER
VIII – EXPLANATIONS AND DECISIONS
Biggles
is on a mission to Norway, posing as a Norwegian citizen called Sven Hendrik,
to chart useful landing sites for British Air Intelligence when the Germans
invade. The speed of the invasion leaves Biggles trapped in the country but
with his passable Norwegian and his fluent German he is able to pass off as a
German sympathiser. Returning to the air club at Boda that he was using as his
base, Biggles finds that the Germans have now taken it over. Due to bluff and
circumstance, Biggles is admitted into the German Air Force with the rank of
"Leutnant". Biggles manages to escape by motorcycle to Sweden where
via the British Consul he is able to speak to Colonel Raymond of Air
Intelligence. Raymond asks him to return to Norway to use his position to spy
for Air Intelligence. Biggles reluctantly agrees, on condition Algy and Ginger
are sent over to work as his back up team. Returning to his air base, Biggles
is cross-examined by Oberleutnant Ernst von Hymann of
the Gestapo. Explaining that he once worked in Canada for Arctic Airways (see Biggles Flies North), Biggles (still posing as Hendrik) is asked if he knows a
former pilot of theirs called "Bigglesworth". When he says that he
does, Biggles is told that "Bigglesworth" has been spotted in Oslo by
a German agent called Brandt, who knows him and Biggles is then enrolled into
the Gestapo and sent to find and identify "Bigglesworth". He is given
a Gestapo pass and allocated the number 2001. Biggles is now in a bizarre and
difficult situation with orders to find himself! Returning to Oslo, Biggles
makes enquiries and discovers that his old enemy Erich von Stalhein has now
flown to Norway to join the hunt for him and they are already starting to get
suspicious about a certain Norwegian called Sven Hendrik. Biggles reports to
Gestapo HQ by telephone and says that he is following Bigglesworth to Narvik.
On the way, he meets some stranded British sailors and taking them into his
confidence, he gets them to say, when they are captured, that a man called
Bigglesworth had been with them and had escaped. Interviewing other British
prisoners at Narvik, under his Gestapo agent disguise, Biggles is shocked to
find Algy one of them. British destroyers attack Narvik and Biggles uses the
opportunity not only to get important information to the ships but also to help
Algy and the other prisoners escape. Biggles is then given a lift by a German
pilot called Schaffer back to his aerodrome at Boda. Biggles again reports to
von Hymann by telephone and is told that von Stalhein
needs to speak to him urgently about Bigglesworth. Obviously, this is something
that Biggles must avoid at all costs as von Stalhein would recognise him
straight away! Biggles is contacted by Raymond via a spy and sent on a mission
to Stavanger Airport to find out details of its defences and take the
information to Fiord 21. This he does, where he finds Ginger waiting for him.
Biggles is all ready to leave Norway as things are too hot for him but Ginger
says that Algy has gone back to Boda to try to find him. Biggles knows he has
to return to Boda. Returning to Boda, things are even more dangerous for
Biggles because suspicion is mounting rapidly. Biggles is forced to speak to
von Stalhein by telephone and he tries to disguise his voice. Convinced that
von Stalhein will not be fooled, Biggles has to get away but only after
locating Algy. Succeeding in this, both Biggles and Algy get back to Fiord 21
only to find a fleet of German Dornier flying-boats have now taken over and
Ginger has gone! Ginger attempts to return and rescue both of them but things
go wrong. Algy is taken prisoner whilst Biggles resumes his Gestapo identity.
Biggles learns vital information that the British North Sea Fleet is about to
sail into a trap. Biggles then bumps into Schaffer who is by now highly
suspicious of Biggles and his activities but scared to arrest him because he is
a Gestapo agent. Schaffer offers to fly Biggles back to Oslo and Biggles
accepts and then hi-jacks the plane. Flying the German machine, Biggles is then
attacked by Ginger but Ginger is shot down by some Messerschmitts. Biggles
rescues Ginger from the water and gives him the vital information to take to
the British fleet. Ginger then drops Biggles off to attempt to rescue Algy. Biggles
tries to rescue Algy but walks straight into a trap set by von Stalhein. Fate
has seen Ginger captured as well, but not before he delivered the vital
message, so now von Stalhein has all three of them. Ginger arrives with an
escort but Biggles and Algy are able to overpower the escort and leave in their
place. Grabbing a Dornier they are at last able to return to England and
safety.
Click here to see the story illustrations from the original HARDBACK first edition of this book
Click here to see the story illustrations from the PAPERBACK edition of this book
Biggles Defies the Swastika
Publication Details - published by Oxford University Press

The spine and cover illustrations from the original Oxford first
edition
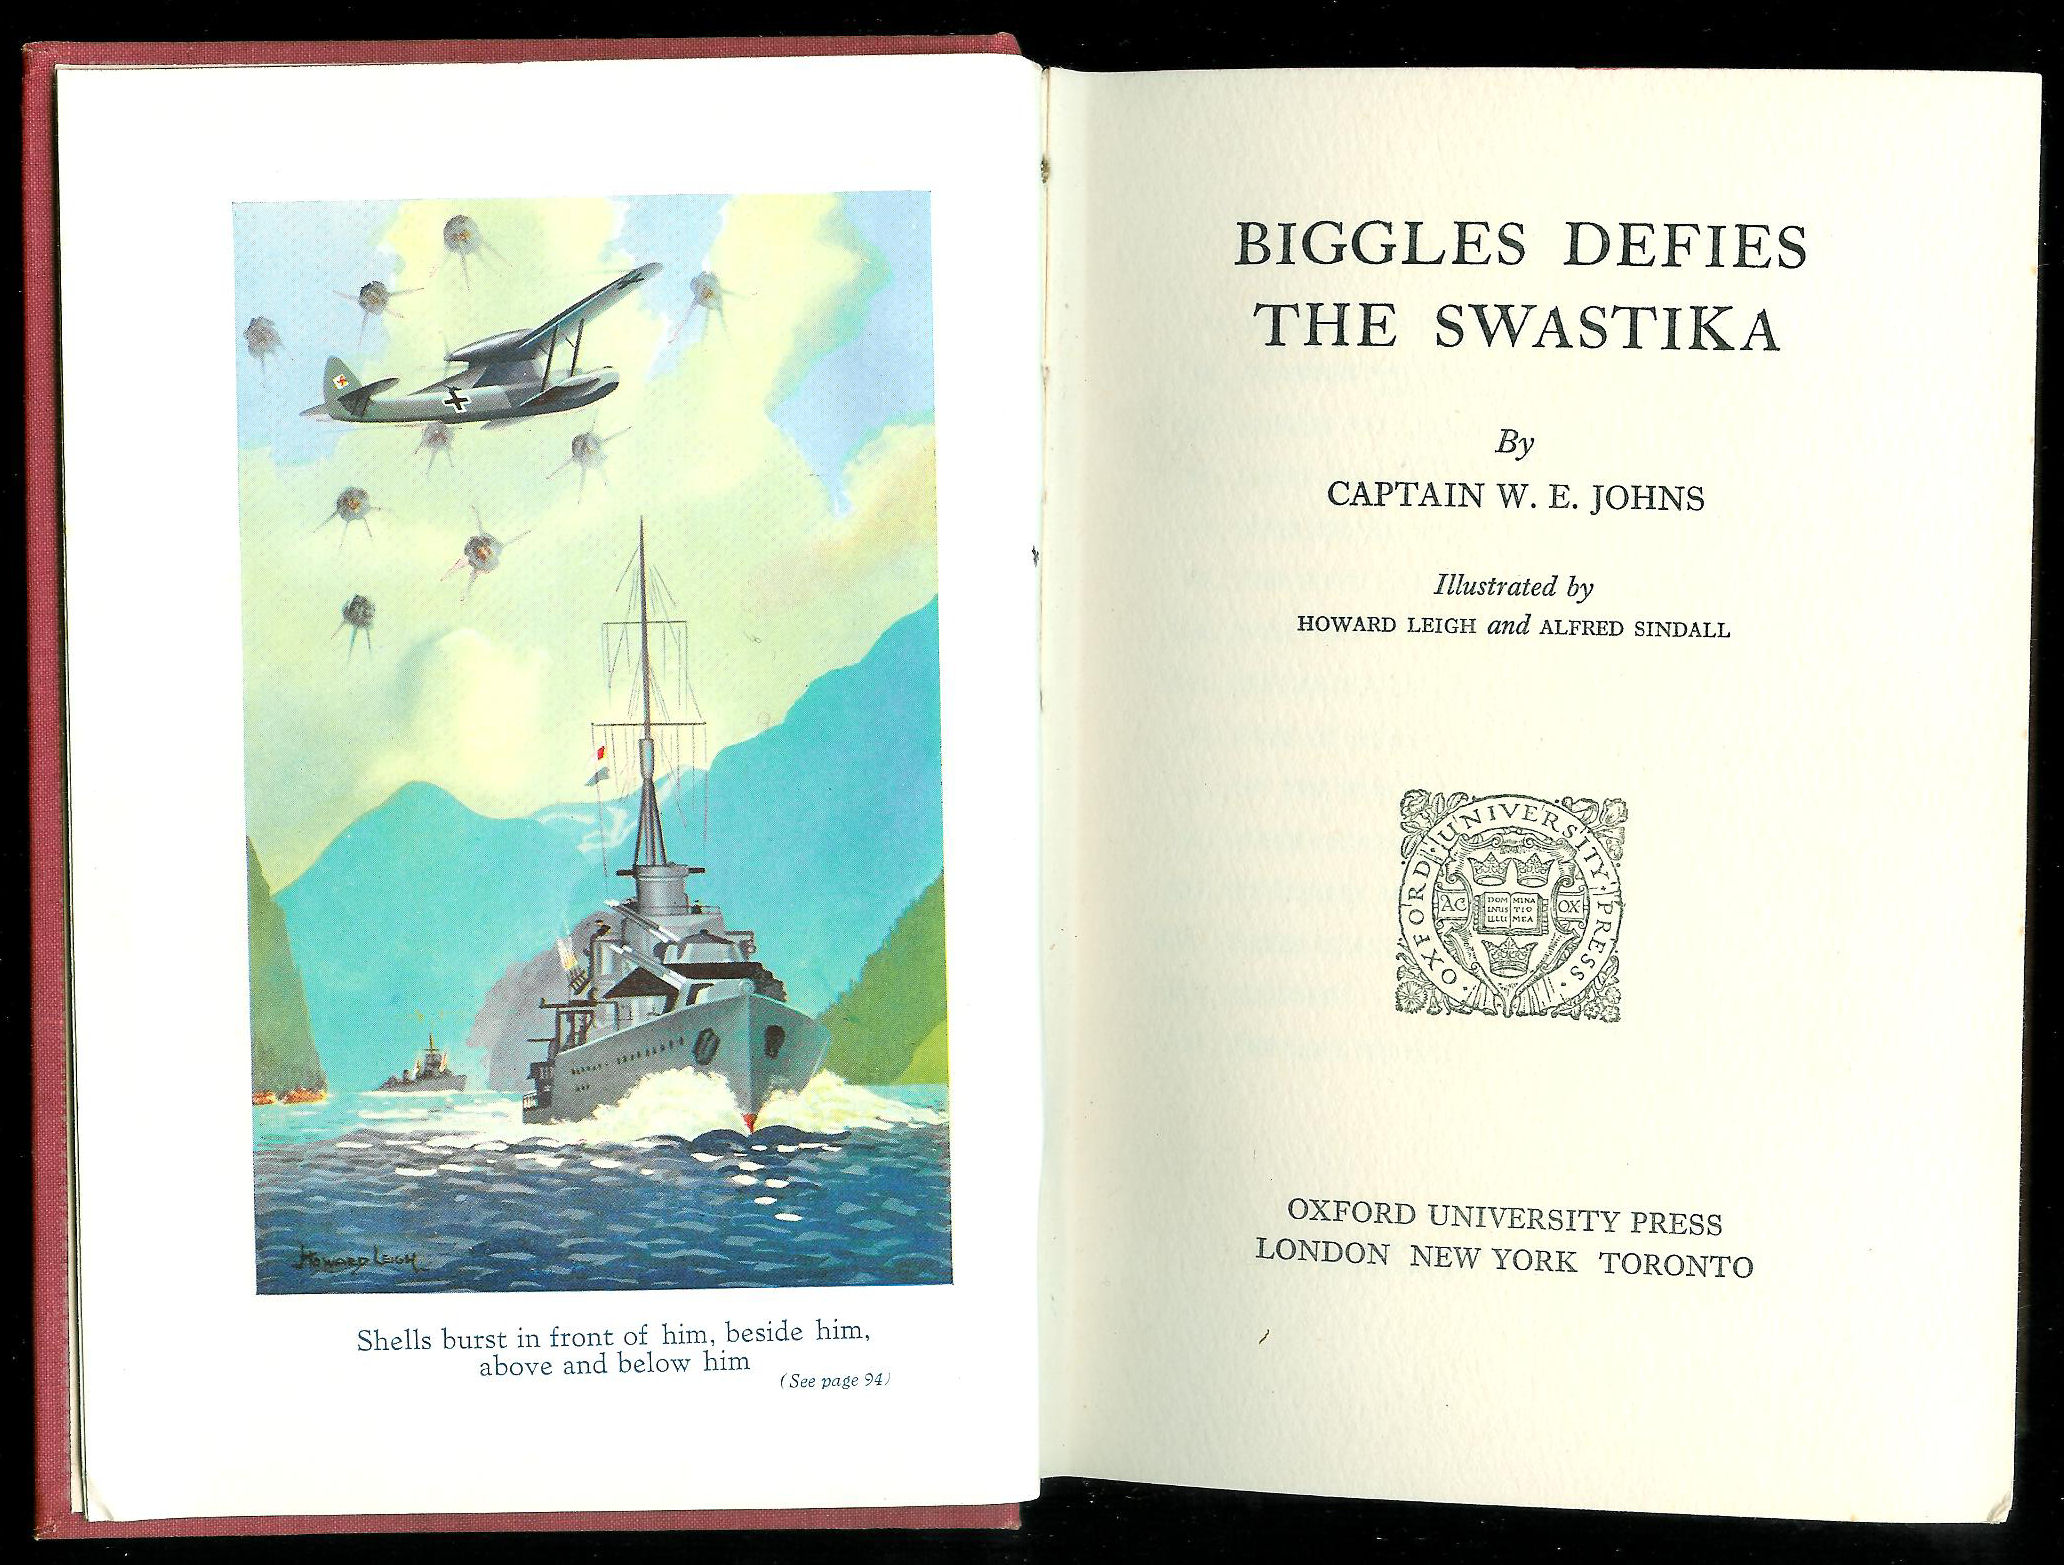
Frontispiece
Click on the above to see it in more detail